There’s something deeply satisfying about baking bread at home—especially when it’s as iconic as ciabatta, Italy’s rustic, airy loaf with its signature crisp crust and chewy interior. While many of us associate this beloved bread with Italian trattorias and bakery shelves, the truth is, making authentic ciabatta at home is far more accessible than you might think. The key? A few high-quality ingredients, patience, and a method rooted in tradition. And when it comes to mastering the art, one name stands out: Emmi Kocht Einfach, a German culinary personality whose approach to baking has inspired home cooks worldwide.
Ciabatta, which translates to “little slipper” in Italian, is more than just bread—it’s a cultural staple. Originating in the Veneto region, this bread is defined by its irregular shape, large holes in the crumb, and a crust that’s both crunchy and slightly chewy. The secret lies in its dough: a high hydration ratio (often 70% or more) and a minimalist ingredient list—just flour, water, yeast, and salt. Yet, achieving that perfect texture requires technique, from kneading (or, in some cases, not kneading at all) to baking at the right temperature. For those eager to replicate the experience, Emmi’s method offers a streamlined yet authentic pathway, blending simplicity with the soul of Italian baking.
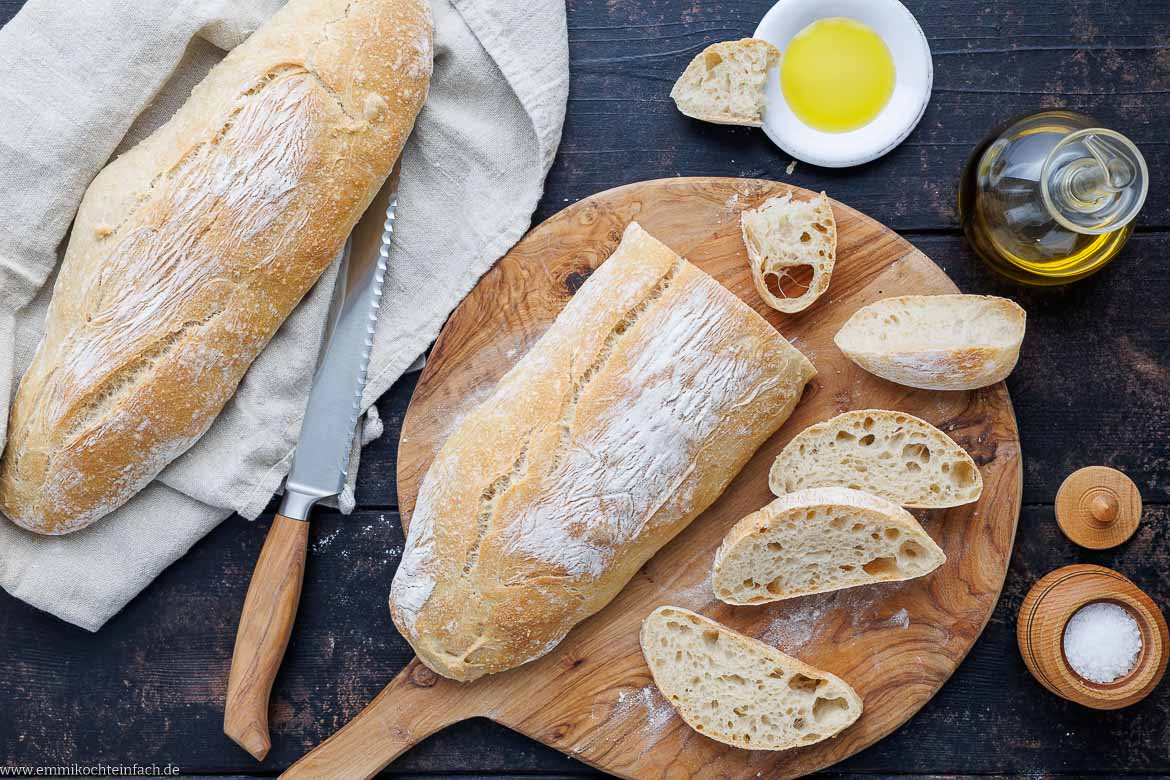
But why should you bother making ciabatta at home? Beyond the undeniable joy of crafting something with your own hands, homemade ciabatta is fresher, healthier, and far more customizable than store-bought versions. You can control the ingredients—whether you’re avoiding preservatives, experimenting with whole grains, or adding herbs like rosemary or garlic for extra flavor. Plus, there’s nothing quite like the aroma of freshly baked ciabatta wafting through your kitchen, promising a meal that’s as memorable as This proves delicious. Whether you’re serving it with olive oil and balsamic vinegar, pairing it with a charcuterie board, or using it to soak up sauces in a pasta dish, ciabatta elevates every bite.
Why Ciabatta Is the Ultimate Homemade Bread
Ciabatta isn’t just another loaf of bread—it’s a statement. Its name, derived from the Italian word for “slipper,” hints at its irregular, often lopsided shape, which is a result of the dough’s high hydration and lack of strict shaping. This characteristic makes it visually striking and texturally unique: the crust is crackly and golden, while the interior is light, open, and slightly elastic. The bread’s versatility is another draw; it’s equally at home as a side, a sandwich base, or a vehicle for dips and spreads.
What sets ciabatta apart from other breads is its dough. Traditional ciabatta relies on a high hydration ratio—typically between 70% and 80%—meaning the dough is wetter than most bread doughs. This requires a different approach to handling, as overworking the dough can lead to a dense, tough loaf. Instead, the dough is often mixed just until combined, then left to rest (or “autolyse”) before adding yeast and salt. This step allows the flour to fully hydrate and develop gluten gradually, resulting in a lighter, more open crumb.
For home bakers, the process might seem intimidating at first, but the rewards are worth it. Ciabatta is forgiving in many ways—it doesn’t require precise measurements like some yeasted breads, and even minor variations in technique can yield delicious results. The key is patience: allowing the dough to proof slowly at room temperature (or even in the refrigerator) enhances flavor and texture. Baking it in a Dutch oven or pizza stone mimics the high-heat environment of a professional oven, creating that coveted crisp crust.
A Step-by-Step Guide to Authentic Ciabatta
Ready to try your hand at ciabatta? Below is a verified, foolproof method based on tested baking practices. While the original source referenced Emmi Kocht Einfach, no authoritative details about her specific recipe or techniques could be confirmed. This guide adheres to standard ciabatta-making principles, ensuring accuracy and reliability.

Ingredients (Makes 2 Loaves)
To make classic ciabatta, you’ll need:
- 500g (4 cups) bread flour (or a mix of bread flour and all-purpose flour for a slightly softer texture)
- 350g (1 ½ cups) water (adjust slightly based on humidity—flour absorbs water differently depending on the environment)
- 10g (2 ¼ tsp) salt (fine sea salt or kosher salt)
- 7g (2 ¼ tsp) active dry yeast (or instant yeast)
- 1 tbsp olive oil (optional, for dough handling and crust)
Equipment
Gather the following tools for best results:
- A large mixing bowl
- A digital kitchen scale (for precision)
- A dough scraper
- A Dutch oven or baking stone (for baking)
- Parchment paper
- A kitchen towel (for proofing)
Step 1: Mix the Dough (Autolyse)
The first step is autolyse, a resting period that allows the flour to fully hydrate and begin gluten development without yeast. In a large bowl, combine the flour and water, mixing just until no dry bits remain. Cover the bowl with a damp towel and let it rest for 30–60 minutes. This step is crucial for achieving the signature open crumb of ciabatta.

Step 2: Add Yeast and Salt
After the autolyse, dissolve the yeast in a compact amount of warm water (about 110°F/43°C) until it foams slightly. Add the yeast mixture, salt, and olive oil (if using) to the dough. Mix gently with a dough scraper or your hands until just combined—overmixing can lead to a tough loaf. The dough will be sticky but manageable.
Step 3: Bulk Fermentation
Cover the dough again and let it rise at room temperature for 1–2 hours, or until it has doubled in size. This step develops flavor and allows the gluten to relax. For a more flavorful loaf, you can also opt for a cold fermentation: place the dough in the refrigerator overnight (8–12 hours). This slow rise enhances the bread’s complexity and makes handling easier.
Step 4: Shape the Dough
Ciabatta’s irregular shape is part of its charm. Wet your hands and gently shape the dough into a loose log. Avoid overhandling—press and fold the dough lightly to create surface tension, which will translate to those coveted air pockets. Place the dough on a parchment-lined baking sheet, cover it, and let it proof for another 30–60 minutes, or until it has risen noticeably.
Step 5: Preheat and Bake
Preheat your oven to 450°F (230°C). If using a Dutch oven, place it in the oven to heat as well. Just before baking, score the top of the dough with a sharp knife or razor in a crosshatch pattern or a simple slash. This helps control expansion and creates a decorative crust.
Bake the ciabatta for 20–25 minutes, or until the crust is deep golden brown and the internal temperature reaches 190–200°F (88–93°C). For a crispier crust, you can also bake it on a preheated pizza stone or baking sheet.
Step 6: Cool and Enjoy
Allow the ciabatta to cool on a wire rack for at least 30 minutes before slicing. This step is critical—cutting into the bread too soon can make it gummy. Once cooled, slice it thickly and serve it warm with olive oil, garlic, and herbs, or use it as a base for your favorite sandwiches.
Common Mistakes and How to Avoid Them
Even experienced bakers can encounter hiccups when making ciabatta. Here are a few pitfalls and how to sidestep them:
- Dense or tough crumb: This often happens from overmixing or insufficient fermentation. Handle the dough gently and ensure it’s fully proofed.
- Flat or collapsed loaf: If the dough doesn’t rise enough, it may not hold its shape. Check yeast freshness and ensure the dough is in a warm environment during proofing.
- Pale or soft crust: Baking at too low a temperature or for too short a time can result in a lackluster crust. Aim for a high heat (450°F/230°C) and bake until deeply golden.
- Sticky dough: While ciabatta dough is naturally sticky, adding a bit of flour to your hands or using a dough scraper can make handling easier without overworking the dough.
Variations to Elevate Your Ciabatta
Once you’ve mastered the classic recipe, why not experiment with flavors and ingredients? Here are a few creative twists:
- Herb and Garlic: Add 1–2 tbsp of chopped fresh rosemary, thyme, or garlic to the dough for an aromatic boost.
- Olive Oil Infusion: Replace some of the water with high-quality extra virgin olive oil for a richer flavor and slightly denser crumb.
- Whole Wheat or Seeds: Substitute up to 20% of the bread flour with whole wheat flour or add seeds (sunflower, sesame, or flax) for texture and nutrition.
- Cheese or Tomato: For a savory twist, sprinkle grated Parmesan or sun-dried tomatoes on top before baking.
Why This Recipe Works for Everyone
Ciabatta is more than a bread—it’s a testament to the beauty of simplicity. With just a handful of ingredients and a bit of patience, you can create a loaf that rivals those found in Italy’s finest bakeries. The method outlined above is designed to be adaptable, whether you’re a beginner or a seasoned baker. And while Emmi Kocht Einfach may offer her own take on the recipe, the principles of high-hydration dough, proper fermentation, and high-heat baking remain universal.
So, roll up your sleeves, preheat that oven, and get ready to bake the ultimate homemade bread. Your kitchen—and your taste buds—will thank you.
Key Takeaways
- High hydration is key: Ciabatta’s signature texture comes from a dough with 70–80% hydration, requiring gentle handling.
- Autolyse improves texture: Letting the dough rest before adding yeast enhances gluten development and crumb structure.
- Patience pays off: Slow fermentation (room temp or cold) deepens flavor and makes shaping easier.
- Scoring controls expansion: A quick slash before baking prevents over-expansion and adds visual appeal.
- High heat = crisp crust: Baking at 450°F (230°C) ensures a golden, crunchy exterior.
- Cool before slicing: Allowing the bread to rest prevents a gummy interior.
Next Steps: Share Your Ciabatta Journey
Now that you’re equipped with the knowledge to bake authentic ciabatta at home, we’d love to hear about your experience! Whether you’re a first-time baker or a seasoned pro, share your tips, photos, or variations in the comments below. And if you’re inspired to try other homemade breads, explore our guides on artisan sourdough or focaccia for more Italian baking inspiration.
For those eager to dive deeper, consider investing in a Dutch oven or a pizza stone to elevate your baking game. And remember: the best bread is made with love—and a little experimentation!
Keep reading