
Tim Brookes
2026-01-10 18:00:00
What’s the point in having a smart home if you can’t depend on it? You should have confidence that your Home Assistant setup will “just work,” just like a dumb home would. In pursuit of this goal, you might need to make a few executive decisions and investments along the way.
(Power-over) Ethernet everywhere
I’d hazard a guess that most devices in your smart home are wireless, which begs the question: why is Ethernet so important? The truth of the matter is that wired networks will always trump wireless ones when you have the option, whether you’re building a simple home network or fleshing out a smart home.
For Home Assistant in particular, opting to connect your server to the network via Ethernet cable lays a solid foundation. Wi-Fi can be patchy in terms of coverage, is affected by things like the weather or your neighbor’s home network, and the network can become congested as you add more and more devices. The more devices you can wire in, the better.
This is especially true when it comes to high-bandwidth devices like video cameras and smart doorbells. One of the benefits of a Home Assistant server is the ability to use solutions like Scrypted to share camera feeds or add-ons like Frigate as a connected network video recorder. Constantly transferring high-resolution video streams across the wireless network is a great way to slow down devices that cannot make use of Ethernet.
On top of this, Power-over-Ethernet (PoE) means that a single cable can be used to power devices and transfer data from them. With a set of PoE cameras, a PoE doorbell, or even a PoE transmitter for your mesh network, you can kill two birds with one stone with a decent run of cable and a PoE injector.
Add or strengthen mesh networks

To further reduce your dependence on Wi-Fi, add a mesh network designed specifically for smart home networking. Technologies like Zigbee, Thread, and Z-Wave allow you to communicate with low-power devices like switches, plugs, sensors, and thermostats using a dedicated mesh network that’s separate from Wi-Fi.
This avoids congesting your wireless network, leaving you with plenty of router overhead to handle smartphones, laptops, and other “true” wireless devices. All of these solutions use mesh networking, with most powered devices (like switches and smart plugs) acting as intermediary routers that expand the range of the network.
Which of these you choose comes down to personal choice. Zigbee has been around the longest, it’s relatively cheap, and there’s a dedicated Home Assistant radio in the form of the ZBT-2 to choose from. Thread is the newest, with the fewest number of devices available at present, but one that looks to become dominant in the future (it too can be deployed with a ZBT-2). Z-Wave trades bandwidth and latency for range, with adapters like Home Assistant’s ZWA-2 capable of communicating with devices a mile away.
-
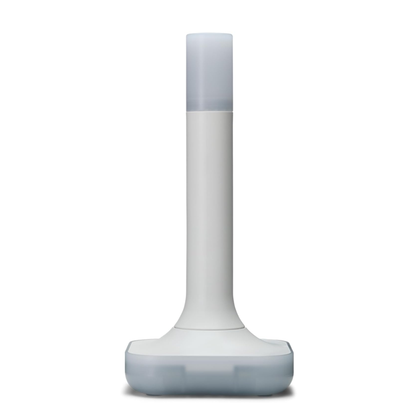
- Dimensions (exterior)
-
83x83x179mm
- Weight
-
157g
The Home Assistant Connect ZBT-2 supports both Zigbee and Thread, although it must be set up for use with either one of the two protocols. It offers 4x the responsiveness of the previous model, and is designed to be easy to open for modding, with accessible pins and pads.
-
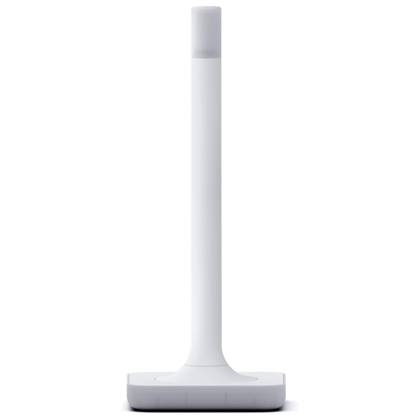
- Compatibility
-
Home Assistant
- Connectivity
-
Z-Wave
The Home Assistant Connect ZWA-2 Z-Wave antenna connects to your Home Assistant setup through a simple USB cable. Offering nearly a mile of range from the hub, you can connect Z-Wave devices even from outbuildings on your property to your Home Assistant setup with this hub.


If you already have a mesh network, you might want to consider strengthening it by adding a few powered nodes in the form of smart plugs to cover any dead zones.
Ditch the memory card (or change server entirely)

The Raspberry Pi is one of the easiest ways to get up and running with Home Assistant since you can easily write a Home Assistant OS image to a memory card using the official Pi imager tool. The single-board computer is capable, power-efficient, and small enough to fit just about anywhere. You can wire it in via Ethernet, and expand capabilities with radios that connect via the USB ports.
Unless you’ve gone out of your way to add an M.2 HAT+ to your Pi, you’re probably running Home Assistant via an SD or microSD card. While this isn’t as risky as it once was, it’s still not a great idea. In addition to being slower than solid-state storage, removable storage isn’t designed to handle the stress of frequent read-write cycles associated with a smart home server.
While you could add an M.2 drive relatively easily, switching away from the Raspberry Pi and towards a mini PC might be the best solution. You can run your Home Assistant server within a virtual machine like VirtualBox or ProxMox, with more overhead available (especially RAM) if you need it. You can also run other software alongside Home Assistant, including roll-your-own cloud storage and music-streaming services that can save you money.
You can then put your Pi to good use by repurposing it for another project.
Static IP addresses

Some devices that connect to Home Assistant over your network, be they wired or wireless, are dependent on an IP address assigned by your router. By default, these devices are assigned IPs dynamically. When you restart your router or the device drops off the network, the next time it connects, it could be using a different address.
While many devices also use a hostname as an identifier, including your server itself (that’s probably http://homeassistant.local:8123), many benefit from a static IP that doesn’t change. If you notice devices sometimes disappear from Home Assistant and become unavailable, reserving an IP (and pointing Home Assistant to it) is a solid first troubleshooting step.
Personally, I’ve set up a static IP for my Home Assistant server itself since I find that the hostname sometimes doesn’t resolve or takes longer than I’d like. By contrast, 192.168.0.208:8123 never fails me. Other integrations depend on a static IP address to work. I’m in the process of adding an air conditioning controller that specifies that a static IP must be used in the documentation.
You can configure static IP addresses for Home Assistant using your router by reserving an entry for the MAC address of the device in question.
A Home Assistant Cloud subscription

Configuring remote access for your Home Assistant server might seem trickier than it’s worth if you’re not familiar with VPN tunneling or opening ports and encrypting your server. If you’re looking for another way to access your smart home server while you’re away from home, consider a Home Assistant Cloud subscription.
Connect your Home Assistant server to your Nabu Casa account and log in with your mobile device. You can now enjoy remote access without having to configure anything or depend on third-party DNS services or VPN providers. For your money, you’ll also get cloud storage for backing up your Home Assistant server to the internet.
Turning on Home Assistant backups is easy, but making sure they’re safe no matter what is a little harder. If the only place you’re storing your backups is on the machine that runs your server, you’re playing a risky game. One solution is to jury-rig your own cloud storage solution, the other is to export directly to Nabu Casa’s servers with Home Assistant Cloud.
But perhaps the most underestimated feature of a Cloud subscription is the ability to use Google Assistant or Amazon Alexa to handle your voice requests. You can also use Home Assistant’s own cloud-based Assist model if you’re feeling let down by the offline version.
With the new year upon us, I’m also taking the opportunity to examine some problems with my Home Assistant server and correct course.


