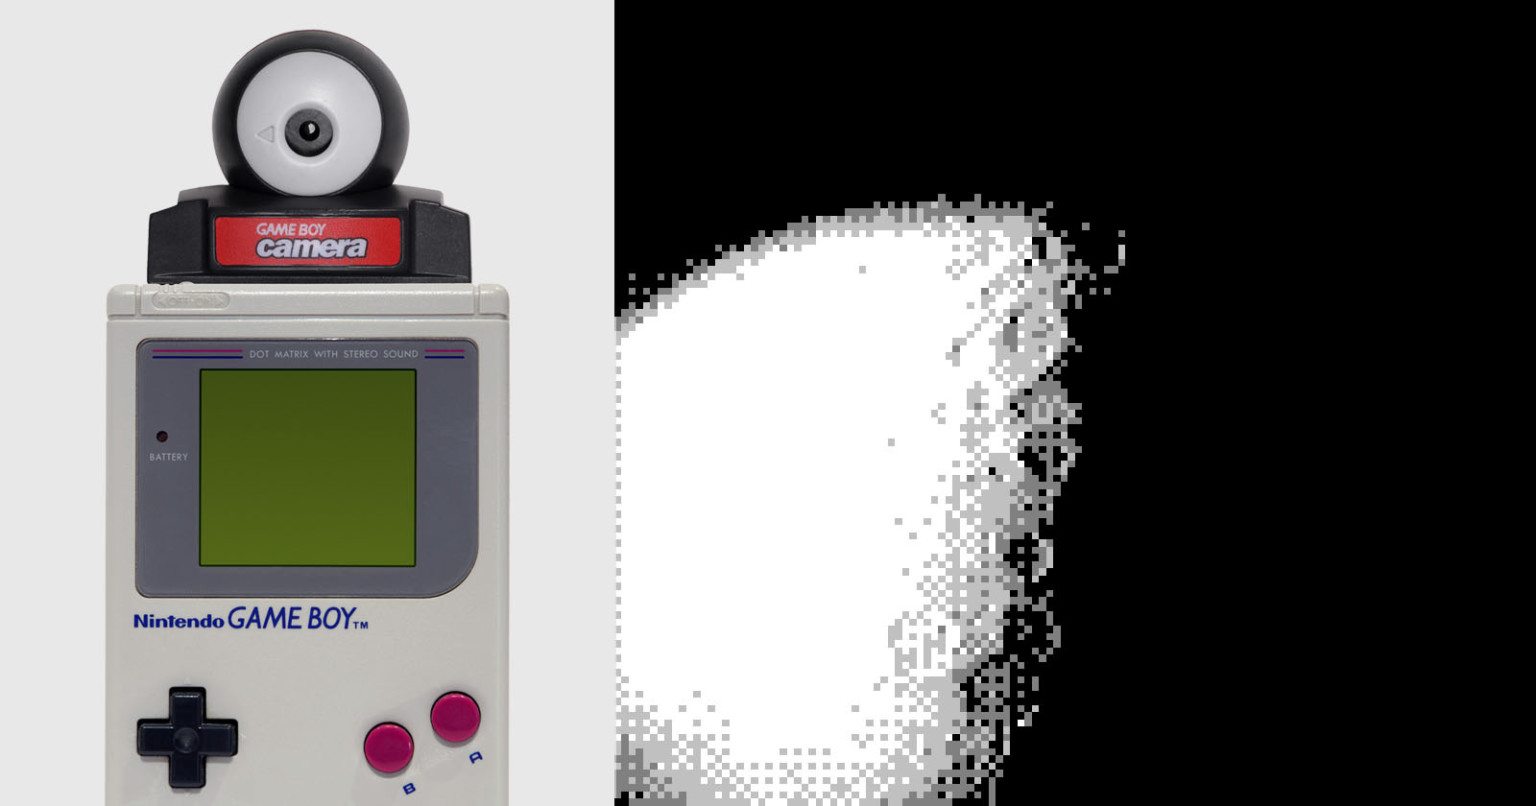
Musician and retro-computing enthusiast Chris Graue has released free, open-source 3D-printable files for a custom mount that allows a Nintendo Game Boy Camera to be attached to a telescope. The project, which gained attention after Graue successfully captured images of Jupiter using the 1998 hardware, aims to provide other hobbyists with the tools to perform similar celestial photography.
The Game Boy Camera, originally released by Nintendo in 1998, features a low-resolution CMOS sensor—specifically 128×112 pixels—that produces a distinctive, monochrome aesthetic. While the device was marketed as a toy for children to take grainy selfies, its interface and digital output have maintained a dedicated following among “retro-tech” hobbyists. By designing a custom adapter, Graue enabled the camera to bypass its original lens and instead utilize the light-gathering capabilities of a standard telescope eyepiece.
According to documentation shared by Graue, the mount is designed to be compatible with common telescope eyepieces, effectively turning the Game Boy’s handheld hardware into an improvised astrophotography rig. The files are available for free, allowing anyone with access to a 3D printer to replicate the setup. This project highlights a growing trend in the maker community of repurposing legacy consumer electronics for specialized scientific or creative pursuits.
The technical process of Game Boy astrophotography
Astrophotography typically requires high-sensitivity sensors and long exposure times to capture light from distant celestial bodies. The Game Boy Camera, however, was never designed for long-exposure photography. To achieve the images of Jupiter, Graue had to work within the limitations of the hardware’s 4-bit grayscale depth and fixed-focus optics. By removing the camera’s original plastic lens and mounting the sensor directly to the telescope, the telescope’s optics provide the magnification and focus that the Game Boy hardware lacks.

The resulting images are characterized by the “dithering” patterns and heavy pixelation synonymous with the Game Boy’s hardware limitations. Despite the low resolution, the ability to discern the bands of Jupiter through a 26-year-old handheld console has resonated with the retro-computing community. The process relies on the “Game Boy Camera” acting as a digital back, capturing the image projected by the telescope’s eyepiece onto the tiny CMOS sensor.
DIY accessibility and open-source hardware
By releasing the design files under an open-source model, Graue has lowered the barrier to entry for others interested in “Game Boy astronomy.” The project requires only a 3D printer, the original Game Boy hardware, and a telescope. This approach aligns with broader movements in the tech industry that prioritize repairability and the extension of hardware lifecycles beyond manufacturer support.
For those interested in replicating the setup, the files are hosted on platforms frequently used by the maker community for 3D design distribution. While Nintendo discontinued the Game Boy Camera in the early 2000s, the secondary market remains active, with hobbyists often using modern accessories—such as specialized cartridges that allow for the easy transfer of image data from the Game Boy to a PC—to preserve these images in higher-quality digital formats.
The intersection of legacy tech and modern hobbyists
The interest in projects like Graue’s reflects a wider fascination with “lo-fi” technology. In an era dominated by high-resolution smartphone cameras and computational photography, there is a distinct aesthetic appeal in working within the constraints of 8-bit or 16-bit era hardware. This is not the first time the Game Boy Camera has been pushed beyond its intended use; over the years, enthusiasts have used it for stop-motion animation, artistic portraiture, and even microscopic imaging.

As of this writing, there are no further official updates or scheduled demonstrations regarding new astronomical projects from the creator. Those interested in pursuing this hobby can find community-maintained documentation on retro-gaming forums and 3D printing repositories. Share your experiences if you attempt this build, and follow our tech section for future updates on creative uses for legacy hardware.